KENDİ AIS ALICINIZI YAPIN (BÖLÜM 1)
OrSoft Mariner PRO ile Tam Uyumlu, Düşük Maliyetli Çift Kanallı AIS Sistemi Kurulumu
Binlerce dolar harcayarak kapalı kutu AIS cihazları almanıza gerek yok. Cebinizdeki akıllı telefonu OrSoft Mariner PRO ile bir radara dönüştürdük. Şimdi sıra, o radara denizdeki diğer teknelerin sinyallerini fısıldayacak kendi donanımımızı kurmakta.
Bu rehberdeki adımları takip ederek, yaklaşık 50-60 USD gibi komik bir maliyetle kendi profesyonel AIS alıcınızı yapacaksınız. Yazılımcı veya elektronikçi olmanıza gerek yok; sadece okuyun ve uygulayın!
ADIM 1: Alışveriş Listesi (Malzemeler)
Öncelikle internetten şu 4 basit donanımı tedarik ediyoruz:
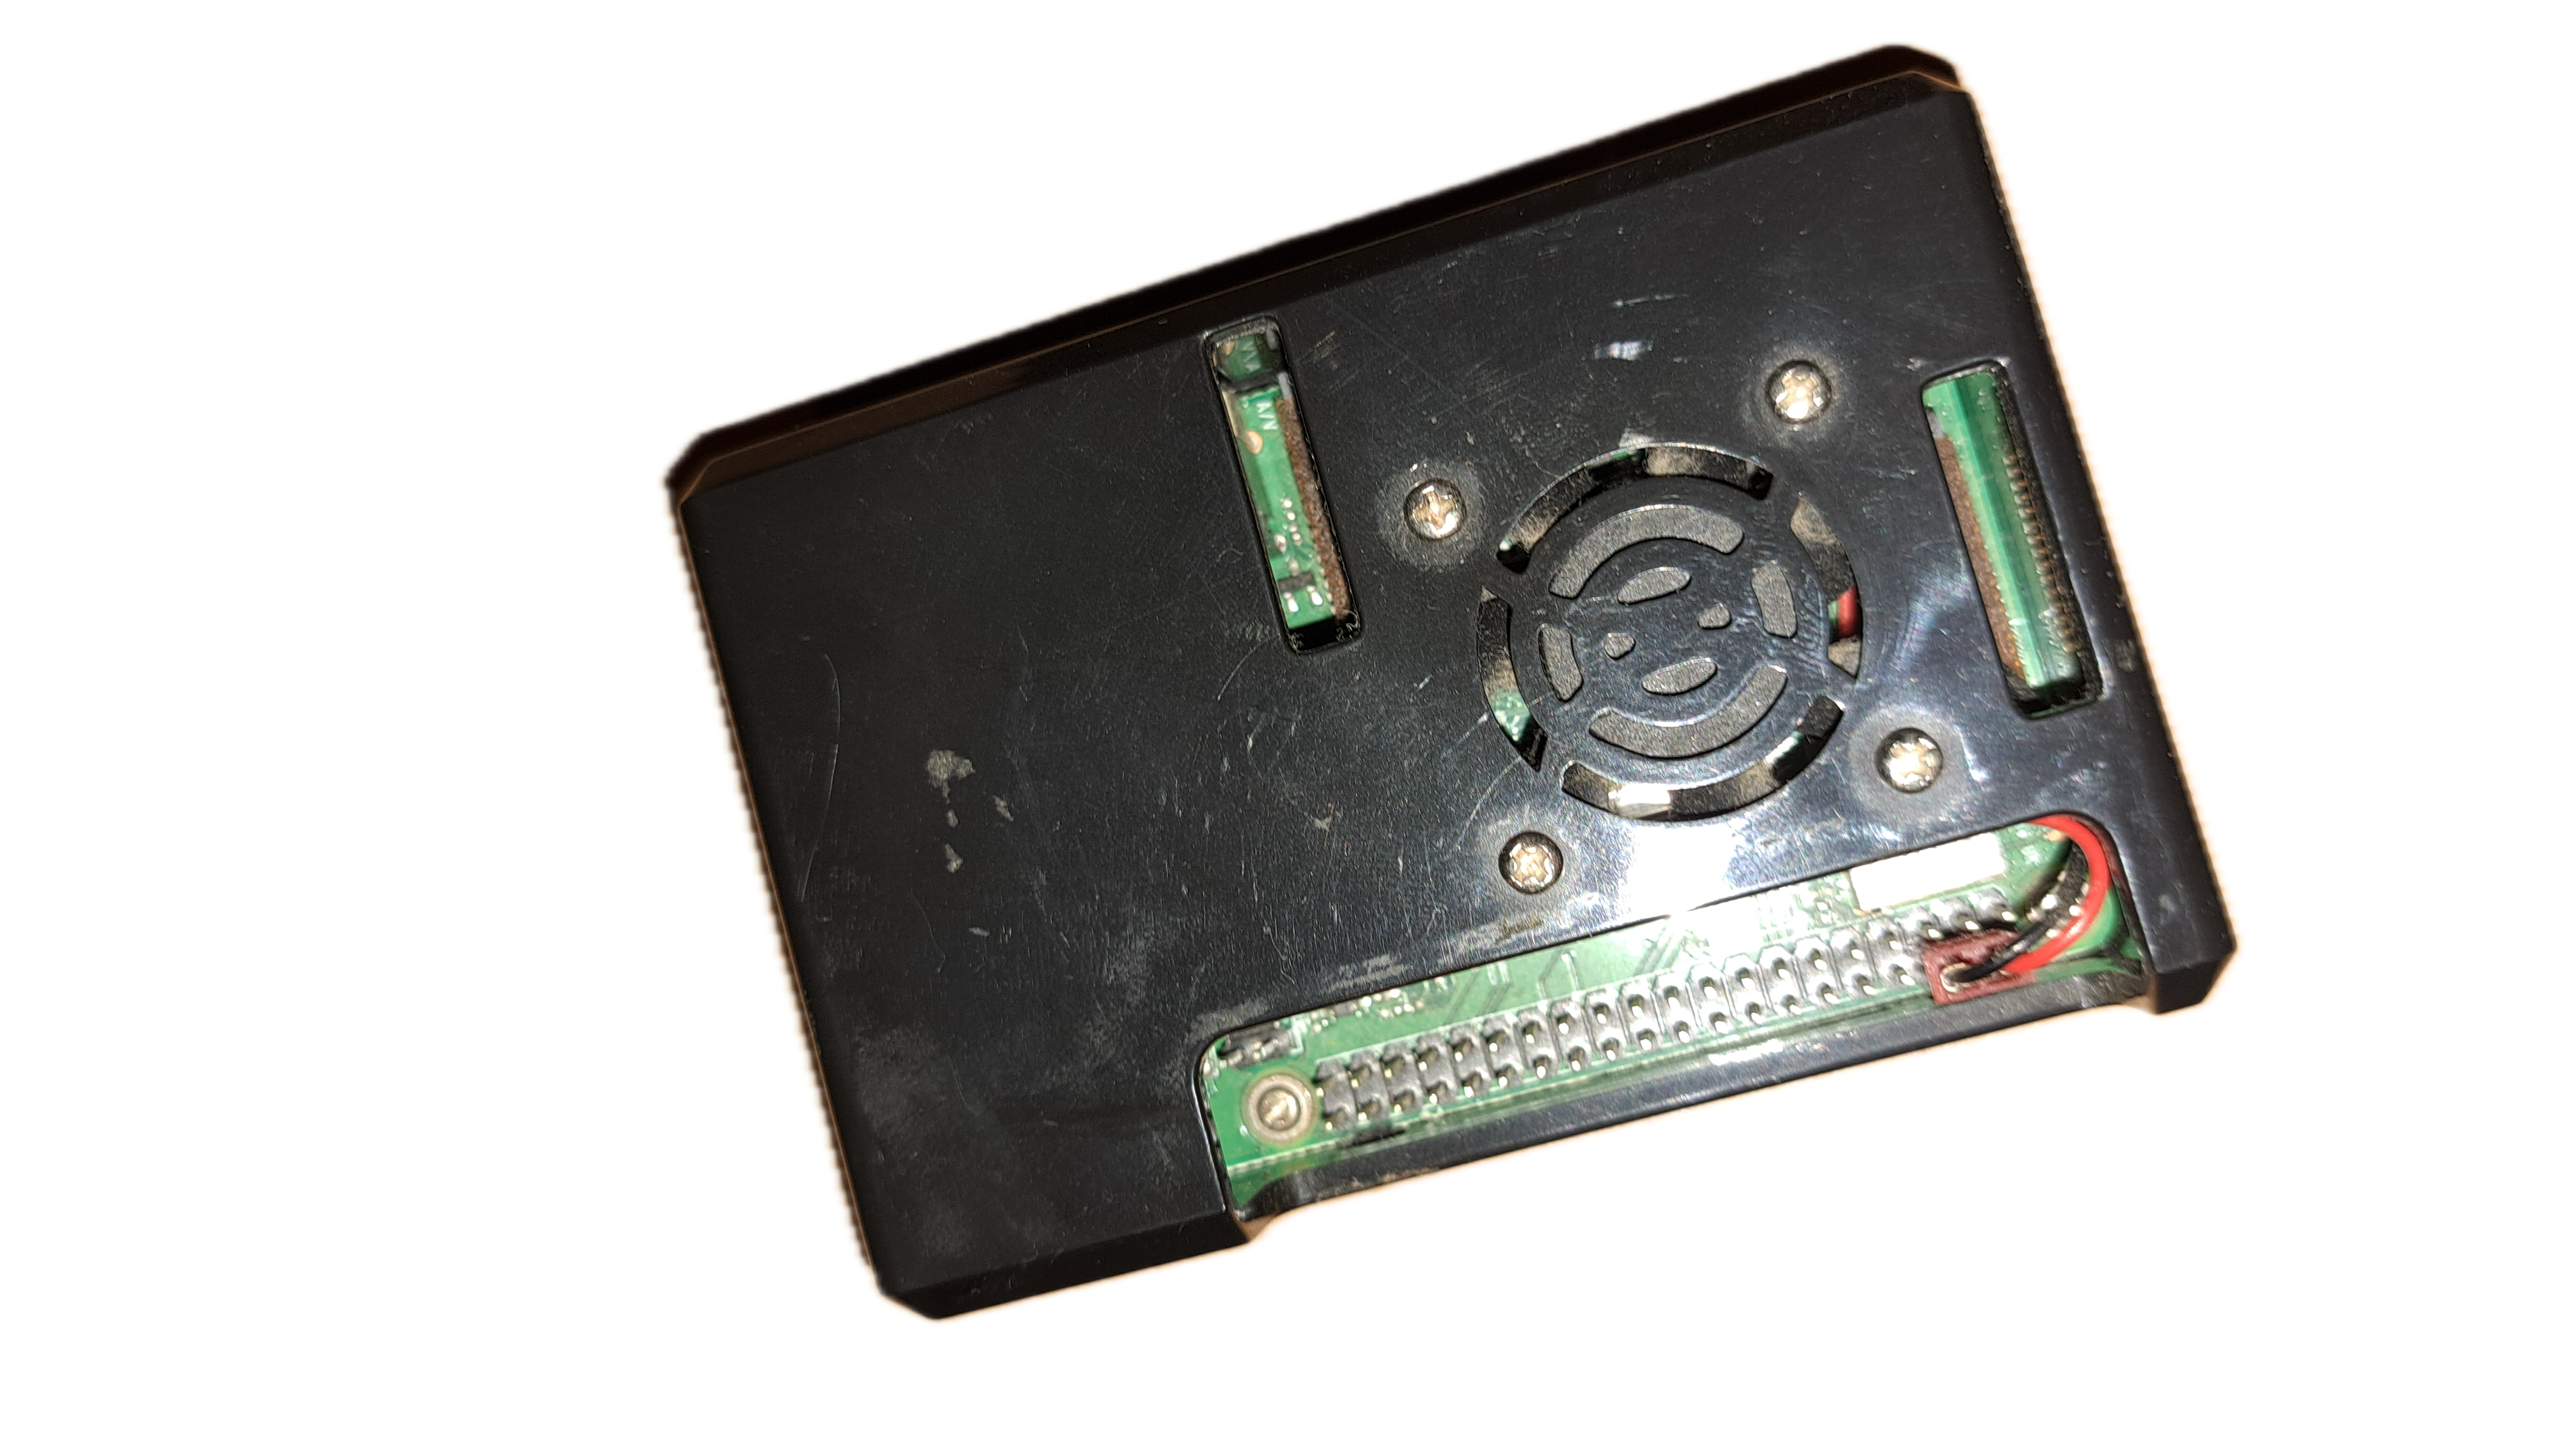
- Raspberry Pi: Kredi kartı büyüklüğünde mini bilgisayar. (Raspberry Pi 3 veya 4 modeli işinizi fazlasıyla görür).
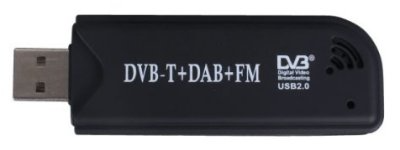
- RTL-SDR USB Dongle: Genellikle mavi veya gümüş renkli, ucunda anten girişi olan küçük bir USB radyo alıcısı. (Üzerinde RTL2832U çipi olan herhangi bir model). Bu cihaz, sistemimizin "kulağı" olacak.
- VHF Anten (Tekne Tipi): Deniz telsizi frekanslarını (162 MHz) yakalayacak standart bir deniz anteni (Teknenizin kıç istiralyasına, güneş paneli arkına veya gurcatasına monte edebilirsiniz).
- Hafıza Kartı ve DC-DC Düşürücü (Voltaj Regülatörü): En az 16 GB kaliteli bir MicroSD kart. Ayrıca teknenizin 12V veya 24V akü sisteminden Raspberry Pi'yi besleyebilmek için "12V/24V to 5V (Minimum 2.5 Amper) Type-C veya Micro USB Çevirici" bir modül. (Doğrudan aküden güvenle güç almak için şarttır).
ADIM 2: Beyni Hazırlamak (İşletim Sistemi Kurulumu)
Raspberry Pi'nin çalışması için hafıza kartına bir sistem yüklemeliyiz. Bu işlemi evinizdeki veya teknenizdeki normal bilgisayarınızda (Windows veya Mac) yapacağız.
- Bilgisayarınıza Raspberry Pi Imager programını indirin ve kurun.
- Hafıza kartınızı bilgisayarınıza takın ve programı açın.
- CHOOSE DEVICE (Cihaz Seç): Elinizdeki Raspberry Pi modelini seçin.
- CHOOSE OS (İşletim Sistemi Seç): Listeden Raspberry Pi OS (32-bit) olanı seçin.
- CHOOSE STORAGE (Depolama Seç): Taktığınız hafıza kartını seçin.
- ⚠️ ÇOK ÖNEMLİ (Ayarlar): Ekrandaki Çark (Ayarlar) simgesine tıklayın.
- "Enable SSH" (SSH'yi etkinleştir) kutusunu işaretleyin. (Şifre doğrulaması kullan'ı seçin).
- Kullanıcı adı (username) olarak
pi yazın, şifre (password) olarak unutmayacağınız bir şifre belirleyin.
- "Configure wireless LAN" (Kablosuz ağı ayarla) kutusunu işaretleyin ve Teknenizdeki router/modem Wi-Fi ağının adını ve şifresini girin. (Not: Eğer teknede router yoksa, lütfen Bölüm 2'deki adımları inceleyin).
- SAVE (Kaydet) butonuna basıp WRITE (Yaz) diyerek işlemi başlatın. İşlem bitince kartı bilgisayardan çıkarın.
ADIM 3: Parçaları Birleştirme (Montaj)
- Hazırladığımız hafıza kartını Raspberry Pi'nin altındaki yuvaya takın.
- RTL-SDR (Radyo Alıcısı) cihazını Raspberry Pi'nin boş bir USB girişine takın.
- VHF Anteninizin kablosunu RTL-SDR cihazının arkasındaki yuvaya vidalayın.
- 12V/24V to 5V çeviricinizin ucunu Raspberry Pi'nin güç girişine takarak cihazı tekne aküsünden beslemeye başlayın. (Cihaz açılacak ve teknedeki Wi-Fi ağına otomatik bağlanacaktır).
ADIM 4: Yazılım Büyüsü (AIS-Catcher Kurulumu)
Artık cihazımız teknenin Wi-Fi ağına bağlı. Şimdi bilgisayarımızdan bu mini cihaza bağlanıp kurulumu tamamlayacağız.
- Bilgisayarınızda Komut İstemini (Terminal veya CMD) açın.
- Şu komutu yazıp Enter'a basın:
ssh pi@raspberrypi.local
- Size emin misiniz diye sorarsa
yes yazın ve belirlediğiniz şifreyi girin. Artık cihazın içindesiniz!
- Şimdi aşağıdaki satırları sırasıyla, tek tek kopyalayıp Terminal'e yapıştırın ve her satırdan sonra Enter'a basın (Sistem bazı kurulumlar yaparken ekrandan yazılar akacaktır, bitmesini bekleyin):
sudo apt-get update && sudo apt-get upgrade -y
sudo apt-get install git make gcc g++ rtl-sdr librtlsdr-dev -y
git clone https://github.com/jvde-github/AIS-catcher.git
cd AIS-catcher
make
sudo make install
Tebrikler! Yazılım kurulumunu hatasız bir şekilde tamamladınız.
ADIM 5: Yayına Başlama ve OrSoft Mariner PRO'ya Bağlantı
Son adımda cihazı çalıştırıp elde ettiği verileri teknedeki Wi-Fi ağı üzerinden telefonunuza (OrSoft Mariner PRO'ya) göndermesini sağlayacağız.
- Terminal ekranına şu komutu yapıştırın ve Enter'a basın:
AIS-catcher -u 0.0.0.0 10110
(Bu komut, AIS-catcher'ı çalıştırır ve bulduğu tüm gemi sinyallerini teknenizin Wi-Fi ağı içindeki 10110 numaralı (UDP) port üzerinden havaya yayınlar.)
OrSoft Mariner PRO'da Yapmanız Gerekenler:
- Cep telefonunuzun/tabletinizin, Raspberry Pi ile aynı Wi-Fi ağına bağlı olduğundan emin olun.
- OrSoft Mariner PRO uygulamasını açın ve Ayarlar menüsüne girin.
- Veri Kaynağı olarak "İç Veri (Wi-Fi/NMEA)" seçeneğini işaretleyin.
- IP Adresi bölümüne Raspberry PI cihazının ip adresini, UDP Port kutusuna 10110 yazın ve Kaydet'e basın. (Eğer Raspberry IP'sini bilmiyorsanız, cep telefonunuza indireceğiniz basit bir "Fing" veya "Network Scanner" uygulamasıyla saniyeler içinde bulabilirsiniz).
İşte bu kadar Kaptan! Artık telefonunuzdaki veya tabletinizdeki radar ekranında, tamamen kendi ürettiğiniz donanımdan gelen, sıfır gecikmeli, gerçek AIS hedeflerini görmeye başlayacaksınız. Çarpışma önleme sisteminiz (CPA/TCPA), dış dünyaya ve internete hiç ihtiyaç duymadan devrede. Rüzgarınız kolayına olsun!
KENDİ AIS ALICINIZI YAPIN (BÖLÜM 2)
Teknesinde Modem Olmayanlar İçin: Raspberry Pi'yi Bağımsız Wi-Fi Ağına Dönüştürme
Açık denizlerde veya koylarda her zaman bir internet modemimiz (router) olmayabilir. Hiç sorun değil! Bu rehberde, Bölüm-1'de kurduğumuz Raspberry Pi cihazımıza "Sen artık bir modemsin, kendi Wi-Fi ağını kendin yarat" diyeceğiz. Böylece cep telefonunuz doğrudan Raspberry Pi'ye bağlanacak.
ADIM 1: Cihaza Bağlanma
(Bunu evde veya telefonunuzun internetini paylaştırarak cihazla aynı ağdayken bir kez yapmanız yeterlidir.)
- Bilgisayarınızdan Komut İstemini (Terminal veya CMD) açın.
ssh pi@raspberrypi.local yazıp Enter'a basın ve şifrenizi girerek cihaza bağlanın.
ADIM 2: Kendi Wi-Fi Ağımızı Yaratmak
Modern sistemlerde bu işlem tek bir komutla yapılır. Terminal ekranına aşağıdaki komutu kopyalayıp yapıştırın ve Enter'a basın:
sudo nmcli device wifi hotspot ifname wlan0 ssid OrSoft_AIS_Network password 12345678
(Açıklama: Bu komut, "OrSoft_AIS_Network" adında ve şifresi "12345678" olan bir Wi-Fi ağı oluşturur. İsterseniz isim ve şifre kısımlarını komutu girmeden önce kendinize göre değiştirebilirsiniz).
ADIM 3: Otomatik Başlatmayı Ayarlama
Teknenin akü şalterini açıp kapattığınızda bu Wi-Fi ağının hep otomatik olarak devreye girmesi için şu komutu girin ve Enter'a basın:
sudo nmcli connection modify Hotspot connection.autoconnect yes
İşte bu kadar! Bilgisayarınızdaki siyah ekranı kapatabilirsiniz. Cihazınız artık denizin ortasında kendi Wi-Fi ağını yayıyor.
ADIM 4: OrSoft Mariner PRO'yu Bağlamak
- Cep telefonunuzun Wi-Fi ayarlarına girin, OrSoft_AIS_Network ağını bulup bağlanın (Şifre: 12345678).
- OrSoft Mariner PRO uygulamasını açın ve Ayarlar menüsüne girin.
- Veri Kaynağı olarak "İç Veri (Wi-Fi/NMEA)" seçeneğini işaretleyin.
- IP Adresi kutusuna Raspberry Pi'nin varsayılan Hotspot adresi olan 10.42.0.1 yazın.
- UDP Port kutusuna 10110 yazıp Kaydet'e basın.
Tebrikler Kaptan! Artık okyanusun ortasında bile olsanız, dış dünyadan tamamen bağımsız kendi kapalı devre radar sisteminize sahipsiniz. Çatışma önleme sisteminiz emrinizde. Rüzgarınız kolayına olsun!
BUILD YOUR OWN AIS RECEIVER (PART 1)
OrSoft Mariner PRO Compatible, Low-Cost Dual-Channel AIS System Setup
There is no need to spend thousands of dollars on closed-box AIS devices. We have turned the smartphone in your pocket into a radar with OrSoft Mariner PRO. Now it's time to build our own hardware that will whisper the signals of other boats at sea to that radar.
By following the steps in this guide, you will build your own professional AIS receiver for a ridiculously low cost of around 50-60 USD. You don't need to be a software developer or an electronics expert; just read and apply!
STEP 1: Shopping List (Materials)
First, we need to procure these 4 simple pieces of hardware online:
- Raspberry Pi: A credit card-sized mini computer. (Raspberry Pi 3 or 4 model is more than enough).
- RTL-SDR USB Dongle: A small USB radio receiver, usually blue or silver, with an antenna input at the end. (Any model with the RTL2832U chip). This device will be the "ear" of our system.
- VHF Antenna (Marine Type): A standard marine antenna to catch marine radio frequencies (162 MHz). (You can mount it on your boat's stern pulpit, solar panel arch, or spreader).
- Memory Card and DC-DC Step Down Converter: A high-quality MicroSD card of at least 16 GB. Also, a "12V/24V to 5V (Minimum 2.5 Amps) Type-C or Micro USB Converter" module to power the Raspberry Pi from your boat's 12V or 24V battery system. (This is essential for safely drawing power directly from the battery).
STEP 2: Preparing the Brain (OS Installation)
To make the Raspberry Pi work, we need to install an operating system on the memory card. We will do this on your standard computer (Windows or Mac).
- Download and install the Raspberry Pi Imager program on your computer.
- Insert your memory card into your computer and open the program.
- CHOOSE DEVICE: Select the Raspberry Pi model you have.
- CHOOSE OS: Select Raspberry Pi OS (32-bit) from the list.
- CHOOSE STORAGE: Select the memory card you inserted.
- ⚠️ VERY IMPORTANT (Settings): Click the Gear (Settings) icon on the screen.
- Check the "Enable SSH" box. (Select 'Use password authentication').
- Set the username as
pi, and set a password you will not forget.
- Check the "Configure wireless LAN" box and enter the name and password of the Wi-Fi network (router) on your boat. (Note: If there is no router on the boat, please refer to Part 2 of our guide).
- Click SAVE and then WRITE to start the process. Remove the card from the computer when finished.
STEP 3: Assembly
- Insert the prepared memory card into the slot underneath the Raspberry Pi.
- Plug the RTL-SDR (Radio Receiver) device into an empty USB port on the Raspberry Pi.
- Screw the cable of your VHF Antenna into the slot at the back of the RTL-SDR device.
- Plug the end of your 12V/24V to 5V converter into the Raspberry Pi's power input to start powering the device from the boat battery. (The device will turn on and automatically connect to the Wi-Fi network on the boat).
STEP 4: Software Magic (AIS-Catcher Installation)
Our device is now connected to the boat's Wi-Fi network. Now we will connect to this mini device from our computer to complete the installation.
- Open the Command Prompt (Terminal or CMD) on your computer.
- Type this command and press Enter:
ssh pi@raspberrypi.local
- If it asks if you are sure, type
yes and enter the password you set. You are now inside the device!
- Now copy and paste the following lines into the Terminal one by one, pressing Enter after each line (Wait for the text to finish scrolling on the screen as the system installs):
sudo apt-get update && sudo apt-get upgrade -y
sudo apt-get install git make gcc g++ rtl-sdr librtlsdr-dev -y
git clone https://github.com/jvde-github/AIS-catcher.git
cd AIS-catcher
make
sudo make install
Congratulations! You have completed the software installation without any errors.
STEP 5: Broadcasting and Connection to OrSoft Mariner PRO
In the final step, we will run the device and have it send the data it receives to your phone (OrSoft Mariner PRO) over the boat's Wi-Fi network.
- Paste this command into the Terminal screen and press Enter:
AIS-catcher -u 0.0.0.0 10110
(This command runs AIS-catcher and broadcasts all the ship signals it finds over the air through UDP port 10110 within your boat's Wi-Fi network.)
What You Need to Do in OrSoft Mariner PRO:
- Ensure that your phone/tablet is connected to the same Wi-Fi network as the Raspberry Pi.
- Open the OrSoft Mariner PRO app and enter the Settings menu.
- Select "Internal Data (Wi-Fi/NMEA)" as the Data Source.
- Enter the IP address of the Raspberry PI device in the IP Address section, type 10110 in the UDP Port box, and press Save. (If you don't know the Raspberry IP, you can find it in seconds with a simple "Fing" or "Network Scanner" app on your mobile phone).
That's it, Captain! You will now start seeing zero-latency, real AIS targets coming entirely from the hardware you built yourself on the radar screen of your phone or tablet. Your collision avoidance system (CPA/TCPA) is active without needing any external world or internet connection. Fair winds!
BUILD YOUR OWN AIS RECEIVER (PART 2)
For Boats Without a Router: Turning Raspberry Pi into an Independent Wi-Fi Network
We may not always have an internet router when out on the open seas or in secluded bays. No problem! In this guide, we will tell the Raspberry Pi we set up in Part 1, "You are now a router, create your own Wi-Fi network." This way, your mobile phone will connect directly to the Raspberry Pi.
STEP 1: Connecting to the Device
(You only need to do this once while connected to the same network at home or by sharing your phone's internet.)
- Open the Command Prompt (Terminal or CMD) on your computer.
- Type
ssh pi@raspberrypi.local, press Enter, and enter your password to connect to the device.
STEP 2: Creating Our Own Wi-Fi Network
On modern systems, this is done with a single command. Copy and paste the following command into the Terminal screen and press Enter:
sudo nmcli device wifi hotspot ifname wlan0 ssid OrSoft_AIS_Network password 12345678
(Note: This command creates a Wi-Fi network named "OrSoft_AIS_Network" with the password "12345678". You can change the network name and password in the command before pressing Enter if you wish).
STEP 3: Setting Auto-Start
To ensure this Wi-Fi network starts automatically every time you turn on the boat's battery switch, enter the following command and press Enter:
sudo nmcli connection modify Hotspot connection.autoconnect yes
That's it! You can close the black screen on your computer. Your device is now broadcasting its own Wi-Fi network in the middle of the sea.
STEP 4: Connecting OrSoft Mariner PRO
- Go to your phone's Wi-Fi settings, find and connect to the OrSoft_AIS_Network (Password: 12345678).
- Open the OrSoft Mariner PRO app and enter the Settings menu.
- Select "Internal Data (Wi-Fi/NMEA)" as the Data Source.
- Type 10.42.0.1 (the default Hotspot address of the Raspberry Pi) in the IP Address box.
- Type 10110 in the UDP Port box and press Save.
Congratulations, Captain! Even if you are in the middle of the ocean, you now have your own closed-circuit radar system, completely independent of the outside world. Your collision avoidance system is at your command. Fair winds!